Packing
What Gear You Really Need
See the "GEAR" page for a checklist of what to bring. This page is more of a discussion.
The real challenge is knowing what you will actually use, and leaving the rest at home. The basics:
- Tent, sleeping bags, pads, and a good tarp
- Simple propane stove, cast iron skillet with a lid, and a decent pot
- Cooler for food and drinks
- Rechargeable headlamps and battery packs
- Daypack per person for the road and hikes
- Mesh bags for dirty laundry, towels, pillows, and blankets
- Personal toiletries and a real coffee setup—not instant, unless you actually like it
It’s tempting to pack for every possible situation, but the more stuff you bring, the more you have to keep track of. Focus on what you know you’ll use.
Organize by Location, Not by Type
Don’t sort everything by “kitchen” or “clothes.” Instead, pack by where it lives in the car and when you’ll need it.
- Roof bag: For compressible, lightweight items you don’t need until you’re camping—tent, sleeping bags, pads, tarps, extra blankets.
- Crates in the trunk: Kitchen kit, cleaning gear, cooking stuff, bug spray, trash bags, propane, etc. Basically, all the camping stuff that doesn’t go on the roof.
- Suitcases and Packing Cubes: We bring one large suitcase for every two people. Each of us gets half the suitcase for our stuff. Inside, everyone uses two packing cubes—one for warm-weather clothes, one for cold-weather layers. This way, it’s easy to find what you need, whether you’re at a hotel or camp, and you don’t end up digging through everyone else’s clothes.
- Coolers: Keep food and drinks cold. We ended up using our secondary cooler for storing bread items.
- Backpacks: Every person gets a daypack. Pack headphones, book or Kindle, chargers, snacks, anything you want on a hike or during the drive. I use a 5th backpack as a “tech bag,” where I keep all of our electronics and wires.
Layering for Comfort
Don’t bring a giant winter coat (they take up too much space). Bring thermals (mens, womens, boys, girls), a hoodie or fleece, a rain jacket, and some gloves. That’s enough for cold nights or a storm. Out west, mornings are cold, afternoons can be hot, and rain happens. Layers give you options without taking up too much space.
Thermal Regulation & Sleeping Comfort
One thing nobody really tells you before your first big camping trip: you have to actively manage your comfort when it comes to temperature. Out West, the air temperature can drop 30 degrees from sunset to sunrise, even in July. You’ll go to bed hot and sticky, and by 3 AM, you’re shivering and digging for more layers. If you don’t plan for it, you’ll wake up miserable.
Here’s what works for us:
- Mix & match sleeping layers: I like to bring a regular bed sheet, a big fleece blanket, and a decent sleeping bag for each person. If it’s warm when I go to bed, I’ll just use the sheet (sometimes I even unzip my sleeping bag all the way and lay on top of it for extra cushion). The blanket is there if I start getting a little chilly.
- Sleeping bag as backup: If the temperature drops more, I pull the sleeping bag over me but don’t bother zipping it up unless I’m really cold. If it gets truly cold, I’ll zip it up, climb inside, and use the blanket as an extra layer on top.
- Dress for the weather: On cold nights, I wear thermals to bed, plus socks and even a knit hat. You lose a lot of heat through your head, so a hat makes a big difference.
- Be ready to adjust: I’m up at least once a night, either kicking off covers or struggling to zip up my sleeping bag. It’s totally normal. You get used to it.
At home, you’re used to the temperature staying the same all night, but outside it’s constantly changing. The trick is to have options: multiple layers you can add or shed, and a plan for the coldest night you’re likely to get. Don’t be afraid to go to bed wearing more clothes than you think you need. You can always peel them off if you get too warm.
Managing temperature is just part of camping life, but once you get your system dialed in, you’ll sleep a lot better.
Real Talk: Sleeping Pad Struggles
I’ve been camping for years and I still haven’t found a great sleeping setup. If you’re hoping for a magic answer here, you’re not going to get one, but just a rundown of what we’ve tried and what’s actually worked (or not).
Inflatable camping pads:
They’re fine. They work. But for us, they’re just not very comfortable. They’re a solid backup, and I keep a couple around just in case, but I can’t say we ever look forward to sleeping on them.
Inflatable “air mattresses” (the big Intex ones):
This year, we brought two of these, the kind you’d use for guests at home, not the slim camping pads. They’re comfortable when they stay inflated, but honestly, I’ve never had one make it through a whole week’s worth of use without slowly deflating. Doesn’t matter if I buy new or baby them, they always end up leaking. I’ve gone through at least ten of these over the last couple of years, both at home and camping, and I’m done with them. The last straw was on this most recent trip where BOTH of them failed. Maybe my kids are too rough, maybe it’s just how these things are made, but it’s always the same story: awesome at first, but they start losing air after just a few uses. And it’s NOT just the mattresses stretching out.
High-end sleeping pads (like Therm-a-Rest):
Everyone online raves about Therm-a-Rest beds on the camping Facebook forums. The catch is, they cost about $200. I have tried to find more affordable options over the years, but at this point I’m planning to invest in these once I save up! I’m hoping its a long term solution, but I’ll believe it when I see it.
Bottom line:
After 15 years of car camping, I’m still searching for the ideal sleeping solution. My advice? Bring backups, expect a little discomfort, and accept that you might be upgrading your sleep system every year or two until you find your “forever” setup. If you do find the holy grail of camp beds, let me know.
Mesh Bags, Cooler, Charging
Mesh bags are a great hack. We use them for laundry, the tent, sleeping bags, sleeping pads, moving blankets, towels… anything that benefits from fresh air and is compressible. We have about ten.
For the cooler, keep drinks at the bottom and anything that can’t get wet in sealed bags at the top. Use hotel ice machines when you can. Dry ice works for keeping things frozen, but handle it with care.
Bring all your charging cables, one portable battery pack per human, and a master power station. Also note that different chargers have different voltages: something I didn’t realize until my stuff was charging super slowly.
Toiletry Pro Tip: Avoid the Lotion Explosion
Bring travel-size toiletries (shampoo, conditioner, lotion, etc.), and be really careful about the kind of containers you use. Don’t pack anything that has a pop-top, flip cap, or anything that can open if it’s squeezed or under pressure. When you drive across the country, especially in the mountains, you’ll go through big changes in elevation. The pressure inside your bottles builds up, and if you’re using anything with a pop-open lid, it’ll probably pop on its own, releasing its contents all over your toiletries.
The fix is simple: use screw-top bottles only for anything that could leak. Avoid anything that pops open or is pressurized.
Tech for the Trip
Phones are honestly essential. We usually try to limit our kids’ screen time at home, but on these trips, all bets are off. You’ve got hours and hours in the car, and everyone is trapped in their seats. So yeah, let them have their phones or tablets. It helps keep everyone sane. Make sure you have headphones for everyone (trust me, you don’t want to listen to whatever YouTube video your kids are watching from the front seat). Download plenty of playlists, audiobooks, and podcasts in advance since you’ll be out of cell range a lot of the time.
If you have a GoPro, bring it. I didn’t expect to use mine as much as I did, but it turned out to be a blast. I got way more into taking videos instead of just photos. Time-lapses of setting up camp, driving through amazing scenery, action shots of the kids swimming or biking: all of that stuff is way more fun to look back on than a million standard snapshots. The only catch is that the GoPro videos take up a ton of space, so I ended up paying for the GoPro cloud storage (about $50/year for unlimited storage). I’m up to around 250 gigs of video and haven’t hit a cap yet. Not sure how they pull that off, but it’s pretty great.
The other musts: bring charging cables for every device, and bring a few portable chargers or battery banks for backup. If your car doesn’t have a lot of USB ports, get a multi-port charger or adapter. Download your navigation maps offline before you go—there are plenty of places with no service at all.
Bottom line: tech makes these trips a lot easier, and a little prep means fewer headaches on the road.
Roof Bags: How to Maximize Space and Keep Your Car Organized
If you’re bringing a family and all your camping gear across the country, you’re going to need a roof bag. They’re easy to find on Amazon, and they’re honestly one of the best investments you can make for a trip like this. The bigger the better. You want to be able to fit all of your soft camping gear up top and then compress it down so it’s tight and secure.
You’ll probably need a roof rack for your car. I had to buy a rack for my Chrysler Pacifica, and I saved money by installing it myself. It was pretty straightforward with some basic tools, and there are lots of good videos online if you want to see how it’s done. Once you have the rack, you can figure out how to attach the roof bag. The straps that came with my roof bag didn’t work with the Pacifica. They just didn’t line up right, so I ended up buying some cam buckle straps (also linked below) and used those to manually secure the bag to the roof rack. It took a bit of experimenting, and I tested it out a bit before hitting the interstates, but once I found a setup that worked, I never had any problems, even at highway speeds and in bad weather.
A couple key things to remember:
- Only put soft camping gear in the roof bag—tents, sleeping bags, pads, tarps, pillows, towels, and blankets all go up top. You want things that can compress down and won’t be damaged by bouncing around.
- Never put anything heavy in the roof bag. Your center of gravity should stay as low as possible, so keep coolers, crates, and other heavy items down on the floor of the car or in the trunk.
- Once you pack the roof bag at home, you shouldn’t need to open it again until you’re at your first campsite. That’s the beauty of it—you get all your camp gear out of the way and make it easy to grab the stuff you’ll need at hotels or on the road.
- Be prepared for a little trial and error the first time you use a roof bag. Practice loading and securing it before your trip, and make sure everything is tight and waterproof.
If you follow this system, it really makes the trip a lot less stressful and keeps your car much more organized. The whole point is to keep hotel stops simple (no need to open the roof bag), keep the inside of your car as open as possible, and to have everything you need for camp ready to go in one place.
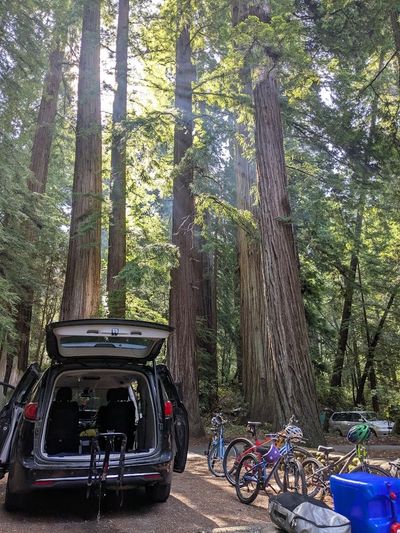
Bikes on the Road
Bringing bikes on a cross-country camping trip is absolutely worth it. There are excellent bike trails out west, and sometimes the best way to explore a campground or get to a swimming area or a store is by bike. Plus, it gives everyone something to do at camp and opens up a lot of family rides and side adventures.
To find great trails, I use AllTrails and Trailforks. AllTrails is great for both hiking and biking, and it has plenty of user reviews and maps so you can get a sense of difficulty and scenery. Trailforks is more mountain-bike focused, and it’s the go-to app if you want to find legit MTB trails, skill parks, or see what others are riding in the area.
A few things to know:
- Bring bikes you won’t mind getting scratched and dirty. Bikes get beat up on these trips. Mine are always due for a major overhaul by the time I get home. I replaced all of our chains and for my bike, also replaced the grips, brake pads, and bottom bracket. Expect the bikes to take a lot of abuse.
- You’re going to need a hitch on your car. I had mine done at U-Haul and it was easy.
- Once you have a hitch, you need a bike rack that fits into it. Here’s where things get interesting: there are some seriously expensive bike racks out there—think Thule and Yakima and all those high-end brands you see on road trips and at national parks. Honestly, I was a little nervous about going with a cheap rack, but I’ve used the same Allen Sports bike rack for about ten years now, and it’s held up perfectly. It’s not fancy, but it gets the job done. If you want to splurge on a premium rack, go for it. But you definitely don’t need to spend $500 on a rack just to carry your bikes. The Allen rack is sturdy and reliable. The only real downside is your bikes might rub together a little, so just be aware of that and maybe throw an old towel or some foam between them if you’re worried about scratches.
- Use Velcro straps to keep the front wheels from spinning and banging against the frame. I also put a sock over the handlebar of the bike closest to the car to avoid scratching the paint.
- Practice your bike rack setup before the trip. It’s a puzzle to get four bikes loaded securely. Once you find a configuration that works, take a photo and stick with it.
- Always bring some basic bike tools, an electric pump, and a few spare tubes. You might get a flat, and it’s important to be able to fix it on your own. No time for bike shops on the trip.
Why You Should Pack Inflatable Tubes (and Wetsuits)
One of the best surprises from our trip was how much fun we had with cheap inflatable tubes. Whenever we camped near a gentle river or a lake, we’d blow up the tubes and go floating—it turned out to be one of the highlights for everyone. We blew these up with our lungs, and I have since purchased an adaptor kit so I can use the electric pump. When it was time to pack up, I’d just sit on each tube and use a multitool to pinch the valve open to deflate them. It took some patience, but it was totally worth it.
A couple tips:
- Always check that the stretch of river or lake is safe for floating—look for slow, shallow areas with no rapids or hazards.
- Bring wetsuits (Mens, womens, girls, boys). Even in summer, the water out west is cold. We used short-sleeve, short-leg wetsuits from Amazon and it let us stay in much longer.
- Tubes barely take up any space when deflated, so they’re easy to stash in the car.
If you’re camping near water, don’t skip this. The scenery is incredible, and it’s a great way to relax or cool off after a hike. For the price and the fun, it’s hard to beat.
Final Word
Use the GEAR page as your base, but don’t try to pack everything you own. What matters most is having a simple system so you know where everything is and you don’t waste time searching for gear. If you pack this way, you’ll have more time to relax at camp and enjoy the trip.